Flipnote Studio has a drafting tool that lets you sketch out what’s on your mind before you even begin to draw!
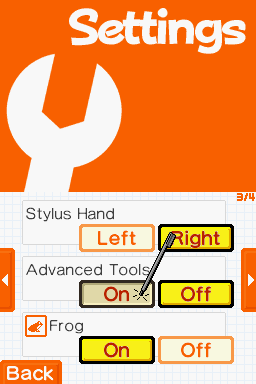
In order to use the drafting tool, you’ll first need to enable the Advanced Tools.
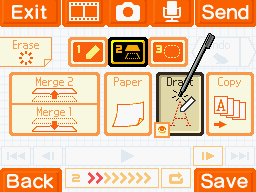
First, open the Flipnote editor and go to page 2 of your tool section. Next, hold your alternate button (L Button, or R button if you’re left-handed) and tap on “Draft”.
Just like the layers, what you’ve drawn with the draft tool can be hidden or shown by tapping the eye icon while holding the alternate button. You can erase it entirely by tapping on the Erase button.
The draft layer is different from other layers, however, in that it won’t be saved with the Flipnote and is the same on all pages. You can draw straight or horizontal/vertical lines by holding the Select or Start buttons.
Use the drafting tool to get an idea of how you’d like to do something, or to draw a simple guide for yourself to reference while working on your Flipnote!